Part 1. How do I know if my battery or charger is bad?

Before testing your charger, it’s essential to determine whether the issue lies with the battery or the charger itself. Many users mistakenly think their battery is faulty when it’s actually the charger that’s malfunctioning. So, how can you tell the difference?
First, you can inspect the battery for visible signs of wear, such as leaks, swelling, or discoloration. These are clear indications that your battery is defective and may need to be replaced. However, if the battery appears to be in good condition, it’s more likely that the charger is the problem.
To confirm, try using the charger with a different battery (if possible) or test a known working charger on your current battery. If the battery charges properly with the alternative charger, the issue lies with your original charger.
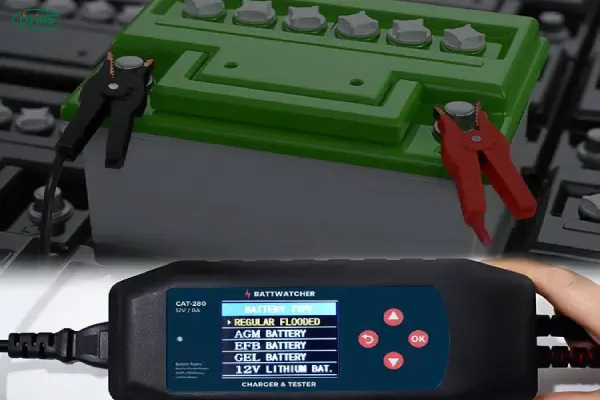
Part 2. How to test the battery charger with a multimeter?
Testing a battery charger with a multimeter is one of the most reliable ways to verify whether the charger is working correctly. A multimeter can measure the voltage output of your charger and help ensure it’s providing the proper current for charging. Here’s a step-by-step guide on how to use a multimeter to test a standard or car battery charger:
Step 1: Prepare the Multimeter
First, ensure that your multimeter is set to the appropriate settings. For testing the battery charger, you’ll typically want to set the multimeter to DC Voltage (since most chargers provide DC output). Here’s how you should set it up:
- Turn the dial to DC Voltage (V-).
- Select a range that is higher than the expected output of the charger (for example, if you expect 12V, set the multimeter to 20V DC).
Step 2: Connect the Multimeter Probes
Next, connect the multimeter’s probes to the charger’s output terminals:
- Red Probe: Insert the red probe into the multimeter’s VΩmA port. Touch the red probe to the positive terminal of the charger’s output (typically marked with a “+” sign).
- Black Probe: Insert the black probe into the COM port. Touch the black probe to the negative terminal of the charger’s output (marked with a “-” sign).
Step 3: Turn On the Charger
Plug your charger into the power source and turn it on. If it’s a car battery charger, make sure the charger is connected to the battery before turning it on. For a standard charger, simply plug it in to activate the charging process. Ensure that the charger is running.
Step 4: Read the Voltage Output
Now that the charger is powered on, check the multimeter reading. The voltage reading should match the nominal voltage of the battery the charger is designed to charge. Here’s what you should expect:
- For a 12V lead-acid battery charger, you should see a reading of around 12V to 14V at the output terminals. This range ensures that the charger is correctly supplying power to the battery.
- For a lithium-ion battery charger, the reading should be around 4.2V per cell for a fully charged 3.7V cell (for example, a 12.6V output for a 3-cell configuration).
What to Look For:
- Correct Voltage Range: If the voltage is within the expected range, the charger is working properly.
- Too Low Voltage: If the voltage is significantly lower than expected, such as 10V instead of 12V, the charger is not outputting enough power. This could indicate a fault in the charger or an issue with its internal components.
- Too High Voltage: If the voltage is too high (for example, 15V instead of 12V), the charger may be overcharging, which could potentially damage your battery. In this case, the charger may be defective, and you should stop using it immediately.
Step 5: Check for Voltage Fluctuations
In some cases, the charger may have a multi-stage charging process (such as a desulfation mode or maintenance charge). If this is the case, you may notice the voltage fluctuating as the charger adjusts its output depending on the battery’s charge level. This is normal for many chargers.
However, if the voltage consistently reads either too high or too low without any variation, this is an indication that the charger is malfunctioning.
Step 6: Test the Charger With No Battery (Optional)
If you want to check the charger’s output when it’s not connected to a battery, simply repeat the above steps with the charger unconnected to any battery. The voltage reading should still reflect the nominal voltage output for that charger.
- For example, if you are testing a 12V charger, the voltage output should still be in the 12V to 14V range, even without a battery connected. However, keep in mind that without a battery, the charger might not be drawing as much current, so this test is more about confirming the voltage output rather than assessing the full charging capacity.
Step 7: Check the Current (Optional)
If your multimeter can measure current (Amps), you can also test the charging current, although this is typically more advanced. Most standard multimeters are not set up to measure high current directly. If you want to measure the current, make sure the multimeter is set to the appropriate Amps (A) setting. You would have to place the multimeter probes in series with the charger and the battery, which is more complex and generally not recommended for beginners.
Interpreting the Results:
- Charger is Working Properly: If the voltage output is within the expected range for the battery type, your charger is functioning as it should.
- Charger is Underperforming: If the voltage is low (for example, less than 11V for a 12V charger), this could mean that the charger is defective or needs repair.
- Charger is Overcharging: If the voltage is significantly higher than expected, the charger might be malfunctioning and could overcharge the battery, which is dangerous.
Troubleshooting Common Issues:
- No Voltage Output: If your multimeter reads 0V, it likely means the charger isn’t outputting any power. This could be due to a faulty internal component, a blown fuse, or a problem with the power cord.
- Inconsistent Voltage: If the voltage fluctuates wildly or keeps dropping, it may indicate that the charger is struggling to provide a stable output, which could be due to a defect in the charger or an overload.
- Voltage Too High or Low: If you notice voltage that’s consistently too high or low, stop using the charger and consider replacing it. Overcharging can damage your battery and present a serious safety risk.
If you’re in need of high-quality, reliable battery chargers or customized battery solutions, Ufine Battery can help. We specialize in lithium-ion and LiFePO4 batteries and offer custom-made charging solutions. For more information, feel free to reach out to us!
Part 3. How to test a battery charger without a battery?
Testing a charger without a battery might seem tricky, but it is possible. Here’s how to do it:
Step 1: Power On the Charger
Plug the charger into a power outlet and turn it on.
Step 2: Test for Output Voltage
Using your multimeter, measure the voltage at the output terminals of the charger. The voltage should match the specifications listed on the charger. For instance, a standard 12V car battery charger should read around 12-14V at the terminals when operating.
What to Look For:
- If there is no voltage output, your charger is likely faulty.
- If the voltage output is too high or too low, the charger may need to be repaired or replaced.
Part 4. How to test a battery charger without a multimeter?
What if you don’t have a multimeter to test the voltage output? Don’t worry, there are still a couple of ways to determine if your charger is working.
Step 1: Use a Known Working Battery
The simplest method is to connect the charger to a battery that you know works. If the battery begins to charge (as indicated by the charging light or a change in voltage), then the charger is likely functioning properly.
Step 2: Use a Charging Indicator Light
Most modern chargers feature a charging indicator light or LED display. Typically, a red light means the charger is actively charging, while a green or blue light indicates that the battery is fully charged. If the light does not change after an extended period, the charger might not be working.
Part 5. Why is my battery charger not charging my battery?
If your charger is plugged in but isn’t charging your battery, there could be several reasons for this. Let’s go through some common causes:
1. Faulty Charger
The charger could be damaged, and as a result, it isn’t supplying power to the battery. A visual inspection may help identify obvious issues like frayed cables or burnt components.
2. Battery Issue
The problem may be with the battery itself, not the charger. If the battery is overcharged, deeply discharged, or damaged, it might not accept a charge. In this case, replacing the battery may be necessary.
3. Connection Problem
Sometimes, the charger’s connection to the battery may not be secure. Check the connectors and cables to ensure everything is plugged in correctly and that there are no loose wires or corroded terminals.
4. Overheating
Some chargers will shut off automatically if they overheat. Ensure the charger is in a well-ventilated area and not operating under excessive load for extended periods.
Part 6. Common charger failures and solutions
When troubleshooting a faulty charger, some issues may be more common than others. Here are a few frequent problems and solutions:
Problem 1: Charger Not Powering On
If the charger won’t turn on, check the power cable and outlet. Test the charger in a different outlet or use a different power cord. If it still doesn’t power on, the charger itself may be defective and require replacement.
Problem 2: Charger Outputting Incorrect Voltage
Sometimes, chargers can deliver too much or too little voltage. If the voltage is too high, it can damage the battery. If the voltage is too low, the battery won’t charge. In such cases, you’ll need to replace the charger with one that’s compatible with your battery.
Problem 3: Battery Not Charging Fully
If the charger works, but the battery doesn’t reach a full charge, it could be that the battery is old or degraded, or the charger isn’t providing enough current. If the battery is the issue, you may need to replace it with a new one. If the charger is underperforming, a higher-quality charger may be needed.
Part 7. Safety tips
When testing or using battery chargers, safety should always come first. Here are a few important safety tips:
- Never leave the charger unattended while it is in use, especially if it is charging high-capacity batteries.
- Inspect the charger for visible damage before use to avoid electrical hazards.
- Always use the charger in a well-ventilated area to prevent overheating.
- If you are using lithium-ion or other high-energy batteries, always use the charger designed for that battery type to avoid dangerous incidents like overheating or fire.
Part 8. FAQs
-
Can I use any charger for my battery?
No, you should always use a charger that is specifically designed for the type and voltage of your battery. Using the wrong charger can damage your battery or even cause safety risks. -
How do I know if my charger is working without a multimeter?
If you don’t have a multimeter, you can test the charger by using a known working battery and observing if it begins charging. Also, check for a charging indicator light. -
Why is my charger not charging my car battery?
If your car charger isn’t charging, it could be due to a faulty charger, corroded terminals, or a damaged battery. Try cleaning the battery terminals and testing the charger with another battery. -
How long should a charger take to fully charge a battery?
The charging time depends on the battery type, capacity, and charger power. Generally, a standard battery charger should fully charge a car battery in 4-6 hours. -
What should I do if my charger is overheating?
If your charger is overheating, turn it off immediately. Ensure that it is in a cool, dry environment and not overloaded. If the overheating persists, the charger may need to be replaced.
Related Tags:

More Articles

How to Choose the Best Floor Scrubber Battery for Commercial Cleaning?
Selecting the ideal floor scrubber battery ensures a long runtime, rapid charging, and minimal maintenance for efficient commercial cleaning operations.
Battery for Blower vs Battery for Leaf Vacuum: Which One Should You Choose?
Battery for blower vs leaf vacuum—learn the key differences in power, fit, and runtime to choose the right battery for your outdoor tool needs.
How to Choose the Right Battery for Blower?
Choosing the right blower battery? Consider voltage, capacity, chemistry & usage. This guide helps match the best battery for peak performance.
How to Choose the Best Insulated Battery Box for Lithium Batteries?
Choosing the Best Insulated Battery Box for Lithium Batteries? Discover key factors such as size, material, and safety for optimal protection and performance.
7 Critical Elements on a Lithium Battery Shipping Label
What must be on a lithium battery shipping label? Learn 7 key elements to ensure safety, legal compliance, and correct handling across all transport modes.
Custom Lithium-ion Battery Manufacturer