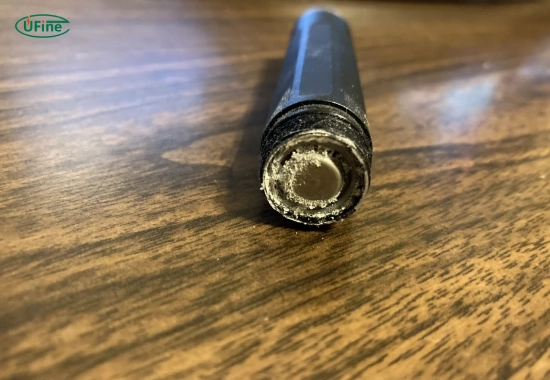
If your flashlight isn’t working correctly, a common culprit could be an oxidized battery. Over time, batteries can corrode or oxidize, leaving behind a white or greenish crusty substance that can damage the flashlight’s battery compartment. Removing oxidation is crucial to restore your flashlight’s functionality and prevent further damage.
In this guide, we’ll walk you through identifying oxidation, safely removing it, and taking the necessary steps to prevent it from happening again. Whether you’re dealing with a minor case of corrosion or a heavily oxidized battery, this article provides a step-by-step approach to ensure your flashlight is back in working order.
Part 1. What is battery oxidation?
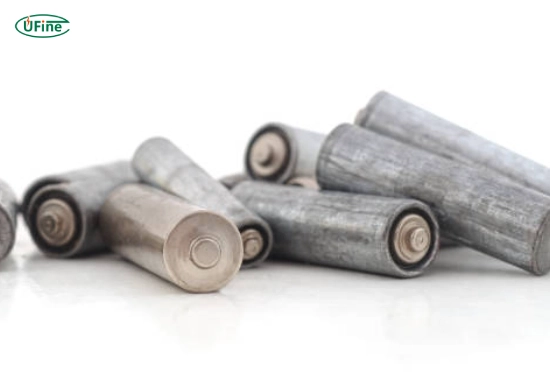
Battery oxidation occurs when leaking electrolytes from a battery react with the surrounding metal and air. This chemical reaction often happens in alkaline batteries when left inside a device for too long. As the battery ages, it may release potassium hydroxide, solidifying it into a white, powdery substance.
This oxidation can hinder the electrical connection between the battery and the flashlight, causing the device to stop working. If left untreated, the corrosion can spread and permanently damage your flashlight.
Part 2. How to identify an oxidized battery in a flashlight?
Before cleaning or removing oxidation, you must confirm whether the issue is due to battery corrosion. Here’s how to identify it:
- Inspect the battery compartment: Open the flashlight and look for white, green, or blue crusty residue on the battery or the metal contacts.
- Check for leaks: Leaking batteries often leave a sticky or hardened substance around the terminals.
- Look for discoloration: Metal parts may appear dull, rusted, or residue-covered.
- Smell the area: Corroded batteries sometimes emit an unusual chemical smell.
If you notice any of these signs, you’re dealing with oxidation and must take action immediately.
Part 3. Why does oxidation occur in flashlight batteries?
Oxidation in flashlight batteries is primarily caused by:
- Old or expired batteries: Batteries lose their integrity as they age, making them more prone to leaks.
- Prolonged storage: Leaving batteries in a flashlight for an extended period can lead to chemical breakdown.
- Extreme temperatures: Exposure to heat or cold can increase the likelihood of a battery leaking.
- Improper handling: Mishandling or dropping batteries can damage their casing, leading to oxidation.
Understanding these causes can help you prevent future incidents.
Part 4. How to safely remove an oxidized battery from a flashlight?
Step 1: Gather your tools
To clean the oxidation safely, you’ll need the following supplies:
- Rubber gloves or protective gloves
- Eye protection (optional but recommended)
- White vinegar or lemon juice
- Cotton swabs or a toothbrush
- Baking soda (for neutralizing)
- A clean cloth
Step 2: Put on safety gear
Battery oxidation contains harmful chemicals, so wearing gloves and eye protection is essential. Avoid touching the residue with your bare hands.
Step 3: Gently remove the battery
Carefully remove the corroded battery from the flashlight. If the battery is stuck, avoid using excessive force as it may damage the compartment. Apply a few drops of vinegar or lemon juice around the edges to loosen it.
Step 4: Clean the battery compartment
Dip a cotton swab or toothbrush in white vinegar or lemon juice. Gently scrub the affected areas to dissolve the oxidation. Use a clean, damp cloth to wipe away the residue.
Step 5: Neutralize the area
Sprinkle a tiny baking soda on the cleaned area to neutralize any remaining acid. Wipe it off with a damp cloth.
Step 6: Dry and inspect
Ensure the compartment is completely dry before inserting new batteries. Inspect the terminals for damage. You may need to replace them if they appear rusted or worn out.
Part 5. Preventive measures to avoid battery oxidation
To prevent future oxidation in your flashlight, follow these tips:
- Remove batteries when not in use: If you don’t plan to use your flashlight for an extended period, remove the batteries.
- Use high-quality batteries: Choose reputable brands with a lower risk of leakage.
- Check expiration dates: Avoid using expired batteries.
- Store in a cool, dry place: Keep your flashlight and batteries away from extreme temperatures.
- Inspect regularly: Check your flashlight periodically for signs of corrosion.
By adopting these practices, you can prolong the lifespan of both your batteries and flashlight.
Part 6. When should you replace the flashlight or its components?
If the oxidation has caused severe damage, cleaning alone may not be enough. Consider replacing the flashlight or specific components if:
- The battery compartment is heavily corroded, and cleaning it doesn’t restore functionality.
- The metal terminals are rusted beyond repair.
- The flashlight housing is cracked or compromised due to the leakage.
Replacing damaged parts promptly ensures your flashlight operates safely and efficiently.
Part 7. What types of batteries are less likely to oxidize?
Not all batteries are created equal. Some are more resistant to oxidation than others:
- Lithium batteries: These are less likely to leak compared to alkaline batteries.
- Rechargeable batteries: NiMH or Li-ion batteries are less prone to oxidation.
- Leak-proof alkaline batteries: Some brands offer leak-resistant alkaline options.
Choosing the right battery type can significantly reduce oxidation risks.
Part 8. Can you use baking soda and vinegar together to clean oxidation?
Yes, but with caution. Baking soda and vinegar can effectively neutralize oxidation but produce a bubbling reaction. Follow these steps:
- Apply vinegar to dissolve the residue first.
- Sprinkle baking soda to neutralize the acid.
- Wipe thoroughly with a damp cloth after the reaction subsides.
This method is highly effective for stubborn corrosion.
Part 9. Are there any risks in cleaning oxidized batteries?
Cleaning oxidized batteries is generally safe if you follow the right precautions. However, there are a few risks:
- Chemical burns: Direct contact with the residue can irritate your skin or eyes.
- Damage to flashlight components: Using abrasive tools or excessive force can harm delicate parts.
- Inhaling fumes: Avoid breathing in any fumes from corroded batteries.
Always prioritize safety and use proper tools to minimize these risks.
Artikel Terkait: A Comprehensive Guide to Flashlight Batteries
Part 10. FAQs
-
Can I clean oxidation without vinegar?
Yes, you can use lemon juice or baking soda paste instead of vinegar. Both are effective at dissolving corrosion. -
How long does it take to clean oxidation?
The cleaning process typically takes 10–20 minutes, depending on the severity of the oxidation. -
Can I still use the batteries after cleaning them?
No, oxidized batteries should never be reused. Dispose of them properly according to local regulations. -
What if my flashlight still doesn’t work after cleaning?
If the flashlight doesn’t work, inspect the terminals for damage. You may need to replace the terminals or consider buying a new flashlight. -
Is it safe to store batteries in a flashlight?
It’s safe for short-term use, but for long-term storage, remove the batteries to prevent leaks and oxidation.
Related Tags:

More Articles

Aluminum Air Battery Design: Materials, Assembly & Efficiency Tips
An aluminum air battery uses aluminum and air to generate power. Learn its materials, assembly steps, and tips to boost energy output and efficiency.
7 Advantages of a Heated Lithium Battery in Cold Climates
Looking to power batteries in freezing temps? Heated lithium batteries excel in cold climates. Here are 7 key benefits and how they work.
How to Choose the Best Floor Scrubber Battery for Commercial Cleaning?
Selecting the ideal floor scrubber battery ensures a long runtime, rapid charging, and minimal maintenance for efficient commercial cleaning operations.
Battery for Blower vs Battery for Leaf Vacuum: Which One Should You Choose?
Battery for blower vs leaf vacuum—learn the key differences in power, fit, and runtime to choose the right battery for your outdoor tool needs.
How to Choose the Right Battery for Blower?
Choosing the right blower battery? Consider voltage, capacity, chemistry & usage. This guide helps match the best battery for peak performance.
Custom Lithium-ion Battery Manufacturer