Replacing a battery connector is straightforward yet crucial, and it can enhance the performance and longevity of your vehicle’s electrical system. Whether dealing with corrosion, damage, or simply upgrading your connectors, knowing how to replace them properly is essential for maintaining a reliable connection. This guide will walk you through the entire process step-by-step, ensuring you have the knowledge and confidence to tackle this job yourself.
Part 1. What is a battery connector?
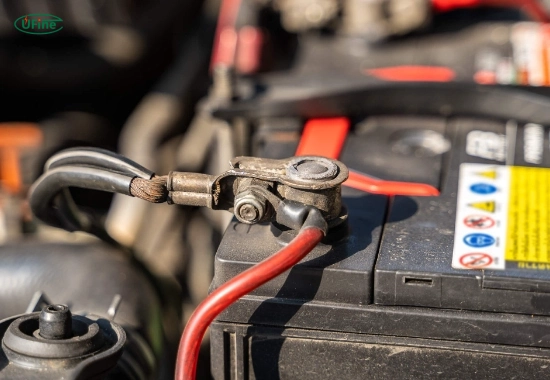
A battery connector is a critical component in your vehicle’s electrical system. It links your vehicle’s battery and various electrical systems, allowing electrical current to flow from the battery to components such as the starter, alternator, and other electronic devices. Battery connectors can come in different forms, including terminal clamps and connectors that can be crimped or bolted onto cables.
Over time, battery connectors can suffer from wear and tear due to exposure to moisture, heat, and chemical reactions within the battery. This deterioration can lead to poor electrical connections, starting issues, or even complete electrical failure. Any vehicle owner needs to understand battery connectors and how they function.
Types of Battery Terminal Connectors
Part 2. Why should you replace a battery connector?
There are several compelling reasons why you might need to replace a battery connector:
- Corrosion: Battery terminals are prone to corrosion due to chemical reactions within the battery. Corroded connectors can impede electrical flow and lead to starting problems.
- Damage: Physical damage from wear and tear or improper installation can compromise the integrity of the connector. A damaged connector may not provide a secure connection, leading to intermittent power loss.
- Upgrading: You can upgrade to higher-quality connectors for better conductivity and durability. Upgrading can improve overall performance and reduce the likelihood of future issues.
Part 3. Essential tools for replacing battery connectors
Before starting your project, it’s essential to gather all necessary tools. Having everything on hand will make the process smoother and more efficient:
- Safety gloves and goggles: Protect yourself from acid splashes and debris.
- Socket wrench set: Useful for loosening and tightening bolts on battery terminals.
- Wire cutters: Needed to cut off old connectors.
- Wire stripper: Helps you remove insulation from wire ends for better connections.
- Cleaning brush (preferably brass): Ideal for scrubbing away corrosion without damaging terminals.
- Baking soda and water solution: A safe way to neutralize battery acid during cleaning.
- New battery connectors: Ensure you have high-quality replacements ready for installation.
- Heat shrink tubing (optional): Provides additional protection against moisture once you make connections.
Part 4. Steps to Replace a Battery Connector
1. Safety First: How do I safely disconnect the battery before replacing the connector?
- Turn Off Your Vehicle: Ensure your vehicle is completely off before starting any work on the battery.
- Wear Protective Gear: Wear safety goggles and gloves to protect yourself from hazards like battery acid.
- Locate the Battery: Open your vehicle’s hood and locate the battery. Familiarize yourself with its layout, including positive (+) and negative (-) terminals.
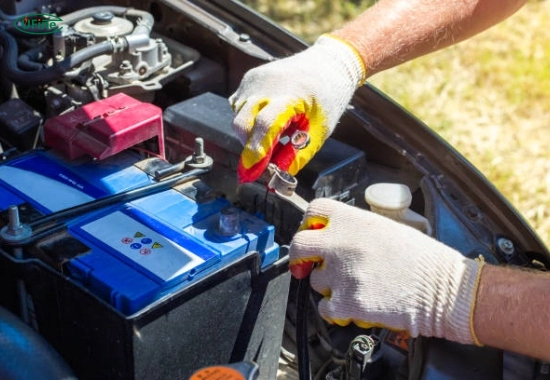
- Disconnect the Negative Terminal First: Start by loosening the nut on the negative terminal (usually marked with a minus sign). Use your socket wrench to remove it from the terminal post carefully. This reduces the risk of short circuits.
- Disconnect Positive Terminal Next: After removing the negative terminal, loosen and remove the positive terminal (marked with a plus sign).
- Secure Loose Wires: To prevent accidental contact with metal surfaces, secure loose wires away from your vehicle’s metal parts while you work.
2. Inspecting Your Current Connectors
Before replacing connectors, inspect them closely:
- Look for signs of corrosion (white or greenish powder) around both terminals.
- Check for physical damage like cracks or breaks in both connectors and cables.
- You may notice significant corrosion or damage extending beyond the terminal itself. It may be necessary to replace the connector and the cable sections that show signs of wear.
3. Cleaning Existing Connections
Before installing new connectors, it’s essential to clean any existing connections:
- Prepare a Cleaning Solution: Mix one tablespoon of baking soda with one cup of water in a small container.
- Apply the Solution: Use a brush dipped in this solution to scrub away corrosion from both battery terminals and cable ends.
- Rinse and Dry: After scrubbing, rinse any residue with clean water and dry thoroughly with a cloth. This step ensures that no cleaning solution remains, which could cause further corrosion later.
4. Removing Old Connectors
Now that everything is clean, it’s time to remove the old connectors:
- Cut-Off Old Connectors: Use wire cutters to snip off old connectors as close to the cable as possible.
- Strip Wires: Use a wire stripper to remove about half an inch of insulation from each wire end, exposing fresh copper for connection.
5. Installing New Connectors
With old connectors removed and wires stripped, follow these steps for installation:
- Insert Wires into New Connectors: Place the stripped end of each wire into its corresponding new connector.
- Secure Connection: Tighten screws or bolts on each connector firmly but avoid over-tightening as this can damage wires or connectors themselves.
- Use Heat Shrink Tubing (Optional): If desired, slide heat shrink tubing over each connection before securing it tightly for added protection against moisture and corrosion in future use.
6. Reattaching Connectors
Once you install your new connectors, it’s time to reattach them:
- Reconnect Positive Terminal First: Attach the positive connector first by placing it on its terminal post and tightening it securely.
- Reconnect Negative Terminal Last: Follow by connecting the negative terminal. Lastly, ensure both connections are tight enough to prevent movement but not so tight that they risk damage.
7. Testing Your Connections
After everything is connected, it’s crucial to test your work:
- Start Your Vehicle: Turn on your ignition to ensure it starts smoothly without hesitation.
- Check Connections: If you notice issues such as flickering lights or difficulty starting, double-check that all connections are secure and corrosion-free.
Part 5. What are the risks of not replacing a damaged battery connector?
Failing to replace a damaged battery connector can lead to several risks:
- Electrical Failures: A poor connection may cause intermittent power loss or complete failure of electrical systems in your vehicle.
- Starting Issues: If your vehicle struggles or fails to start due to bad connections, you may find stranded unexpectedly.
- Increased Wear on Components: Over time, poor connections can put additional strain on other electrical components like starters and alternators, leading to costly repairs down the line.
- Safety Hazards: In extreme cases, damaged connectors can lead to sparks or even fires if they create shorts in wiring systems.
By replacing damaged connectors promptly, you can avoid these risks and ensure your vehicle operates safely and efficiently.
Part 6. FAQs
-
What tools do I need to replace a battery connector?
You will need safety gloves, goggles, a socket wrench set, wire cutters, wire strippers, a cleaning brush, baking soda solution for cleaning, new battery connectors, and optionally heat shrink tubing. -
How often should I check my battery connectors?
It’s advisable to check your battery connectors at least every six months or whenever you perform routine maintenance on your vehicle. -
Can I replace just one connector?
Yes! If only one connector is damaged or corrupted, you can replace it without changing others unless they show signs of wear. -
What should I do if I notice severe corrosion?
If severe corrosion is present beyond the surface level on terminals, consider replacing both the terminals and possibly the cable sections if necessary. -
Is it safe to clean battery terminals with water?
While cleaning with water is acceptable when mixed with baking soda to neutralize the acid, ensure you dry everything thoroughly afterward to prevent further corrosion.
Related Tags:
More Articles

How to Choose the Best Floor Scrubber Battery for Commercial Cleaning?
Selecting the ideal floor scrubber battery ensures a long runtime, rapid charging, and minimal maintenance for efficient commercial cleaning operations.
Battery for Blower vs Battery for Leaf Vacuum: Which One Should You Choose?
Battery for blower vs leaf vacuum—learn the key differences in power, fit, and runtime to choose the right battery for your outdoor tool needs.
How to Choose the Right Battery for Blower?
Choosing the right blower battery? Consider voltage, capacity, chemistry & usage. This guide helps match the best battery for peak performance.
How to Choose the Best Insulated Battery Box for Lithium Batteries?
Choosing the Best Insulated Battery Box for Lithium Batteries? Discover key factors such as size, material, and safety for optimal protection and performance.
7 Critical Elements on a Lithium Battery Shipping Label
What must be on a lithium battery shipping label? Learn 7 key elements to ensure safety, legal compliance, and correct handling across all transport modes.


